Your wheel
Pick or import a wheel model, set its pivot, align it in VR and put a live dashboard on its screen.
The wheel page puts a 3D model of your steering wheel in the car. It turns with the sim's steering. A model with a display can show a SimHub dashboard on it.
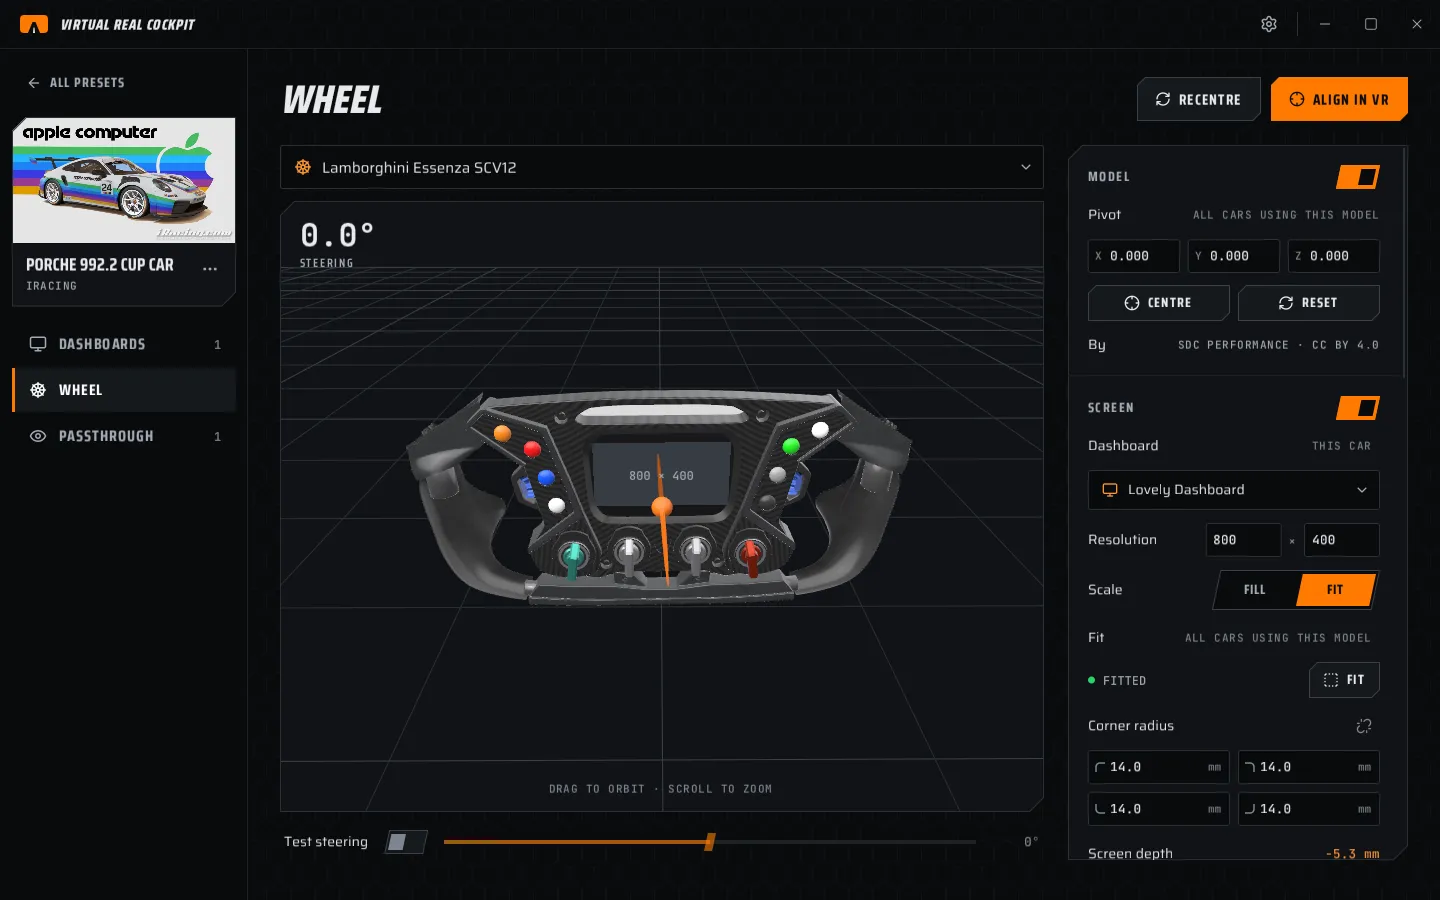
Hide the sim's own steering wheel if it has that option. Otherwise both wheels show.
Pick a model
The select above the viewport lists:
- The bundled models: Lamborghini Essenza SCV12 and Racing Steering Wheel.
- Models you loaded before.
- Load your own model…
The model you pick is used for every car.
Load your own model
- Choose Load your own model….
- Pick a .glb, .gltf, .fbx, .obj or a downloaded .zip.
- .glb and .gltf are used where they are. The others are converted once. The select reads Importing <file>… meanwhile.
- The toast says Model imported, or Model imported, scaled to 32 cm when the model was far too small or large.
Blender files (.blend) cannot be read. In Blender, use File > Export > glTF 2.0 (.glb) and load that.
Lighter models run faster. A rim of 50 000 triangles looks the same at arm's length as one of 300 000.
The viewport
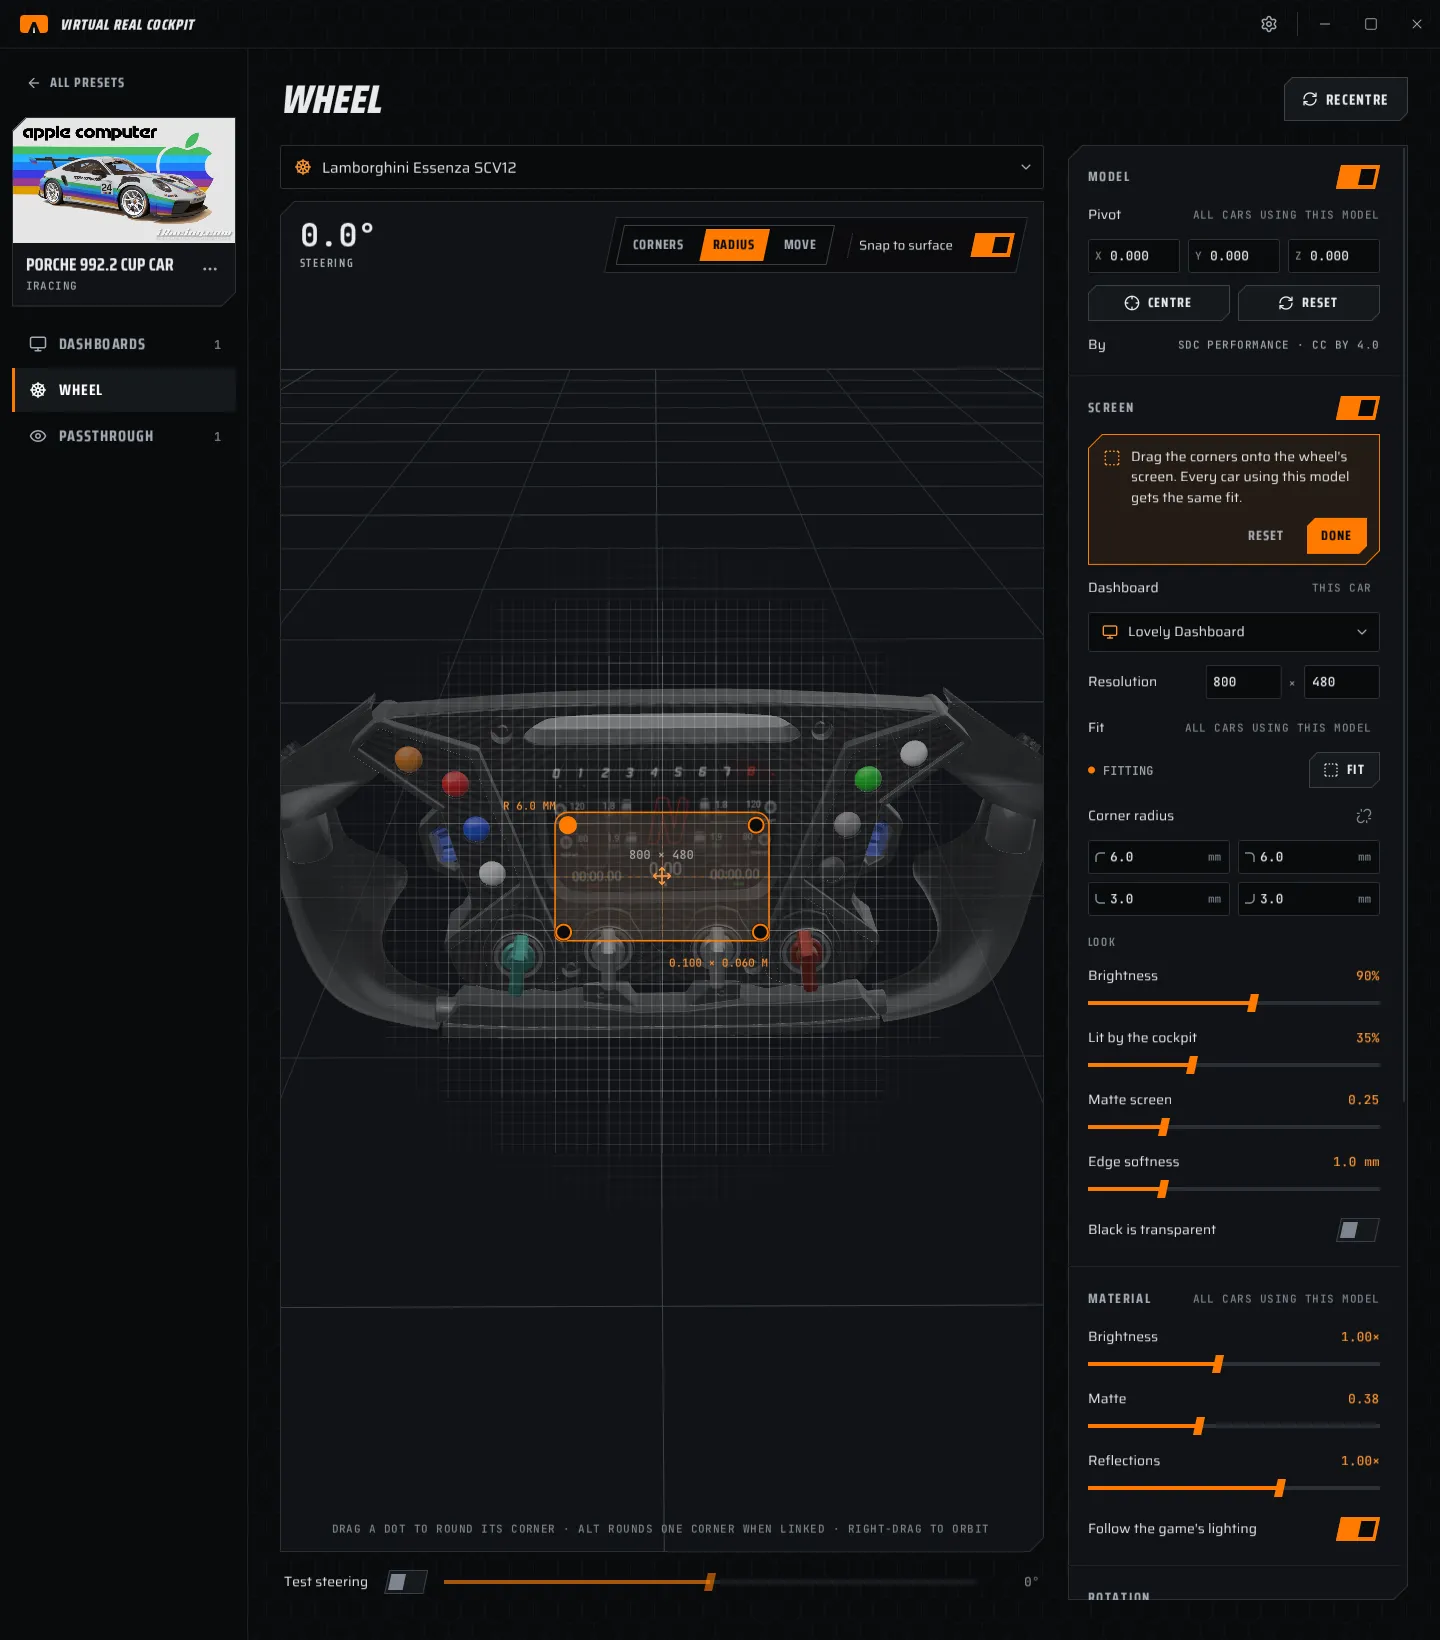
Drag to orbit, scroll to zoom. The papaya dot and rod show the pivot and the spin axis. STEERING shows the angle.
Test steering under the viewport turns the wheel without a sim running. Use the slider to check the direction.
MODEL
| Row | What it does |
|---|---|
| Switch | Show or hide the wheel for this car. |
| Pivot | The point the model turns about: the centre of the steering shaft, in metres. Shared by every car using the model. |
| CENTRE | Puts the pivot at the centre of the model. |
| RESET | Puts the pivot at the model's origin. |
| By | The author and licence of a bundled model. |
Align it in VR
This puts the model exactly where your real wheel is.
- Sit in your rig with the headset on, the sim running.
- On the Wheel page, choose ALIGN IN VR. A pink marker appears in front of you and edit mode turns on.
- In VR, hold grip on the marker and drop it on the centre of your steering shaft.
- Choose SET HUB HERE, on the desktop or in the VR wheel window.
- The model moves there, facing you.
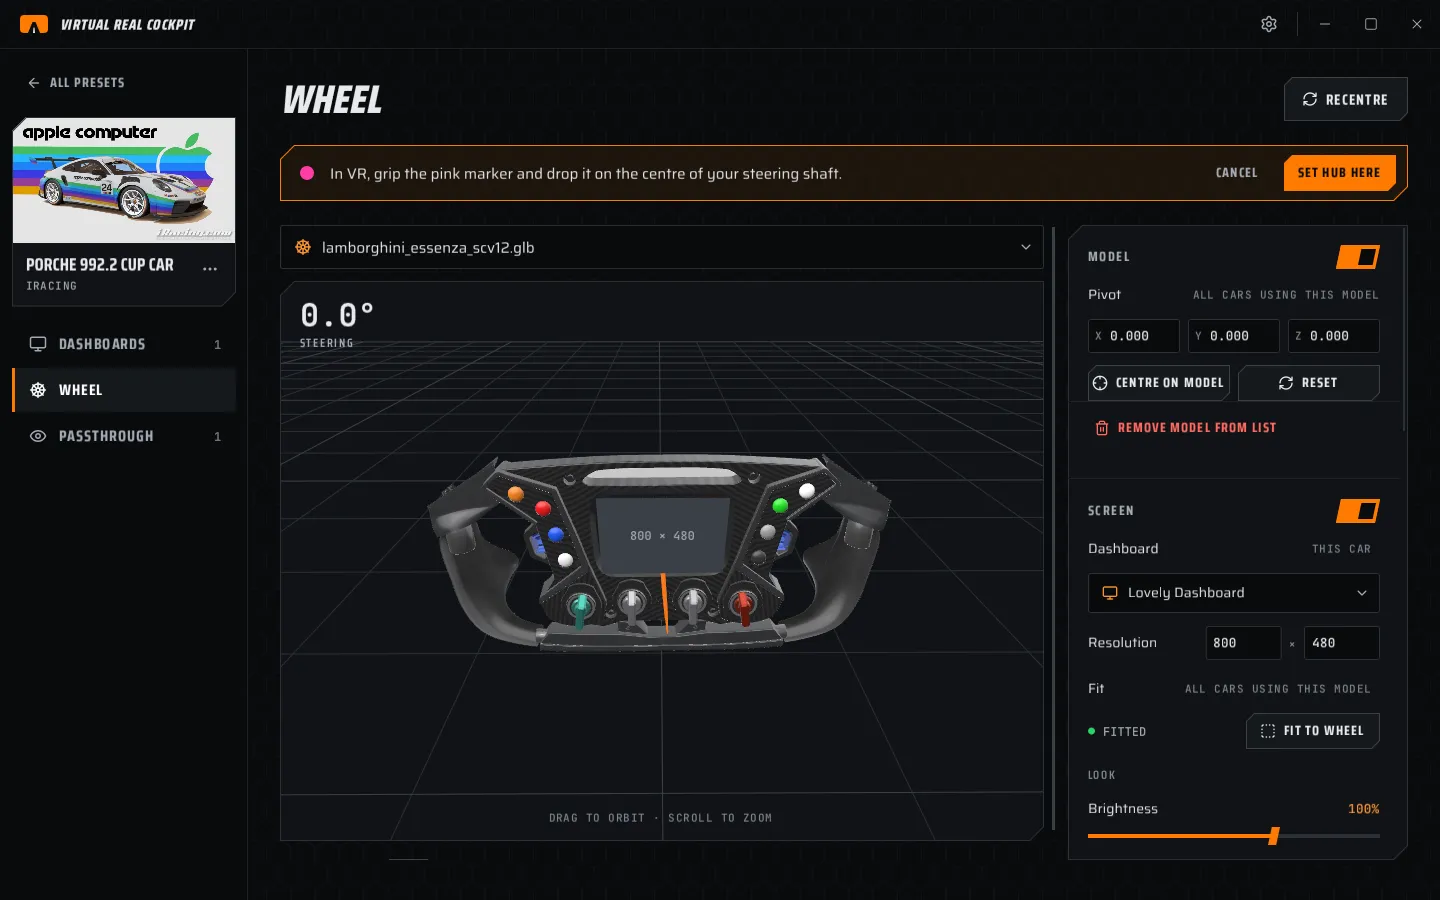
Fine-tune with Scale and the PLACEMENT fields. FACE ME turns it upright and towards you.
ROTATION
| Row | What it does |
|---|---|
| Scale | Size of the model. |
| Spin axis | X, Y or Z: the axis the model turns about. Bundled models use Z. |
| Flip spin direction | Turn the other way about the axis. |
| Invert steering | Swap left and right. |
| Steering range | Lock to lock in degrees. Empty: From game. Automobilista 2 does not report it, so set it here. |
The wheel screen
Turn on SCREEN › This wheel has a screen to show a SimHub dashboard on the wheel's display. It turns with the wheel.
The screen's shape, fit and depth belong to the model: every car using the model shares them. The dashboard and how it looks belong to the car (THIS CAR).
The bundled Lamborghini Essenza comes fitted. Pick a dashboard and it works.
Pick the dashboard
- Under Dashboard, pick a SimHub dashboard from the list.
- Set Resolution, for example 800 × 480. Match your dashboard's design size.
- Set Scale:
- FIT shows the whole dashboard, as large as it fits inside the screen and its rounded corners. The space around it is black.
- FILL fills the screen. The edges that do not fit are cut off.
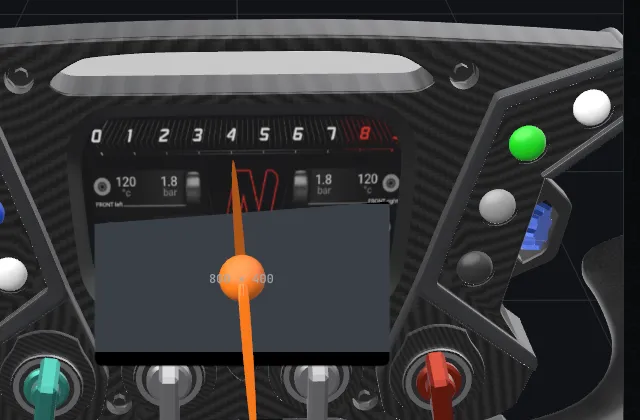
The screen uses one dashboard slot, so a car with a wheel screen holds 7 other dashboards. With 8 already, the toast says No room for another dashboard.
Fit the screen to the model
- Choose FIT on the Fit row. Fit mode opens: a grid, handles and a tool panel.
- With CORNERS, drag each corner onto the corner of the wheel's display. Shift keeps the ratio.
- Keep Snap to surface on so the corners slide over the model.
- With MOVE, drag inside the screen to move all of it.
- Choose DONE (or press Esc). RESET starts over.
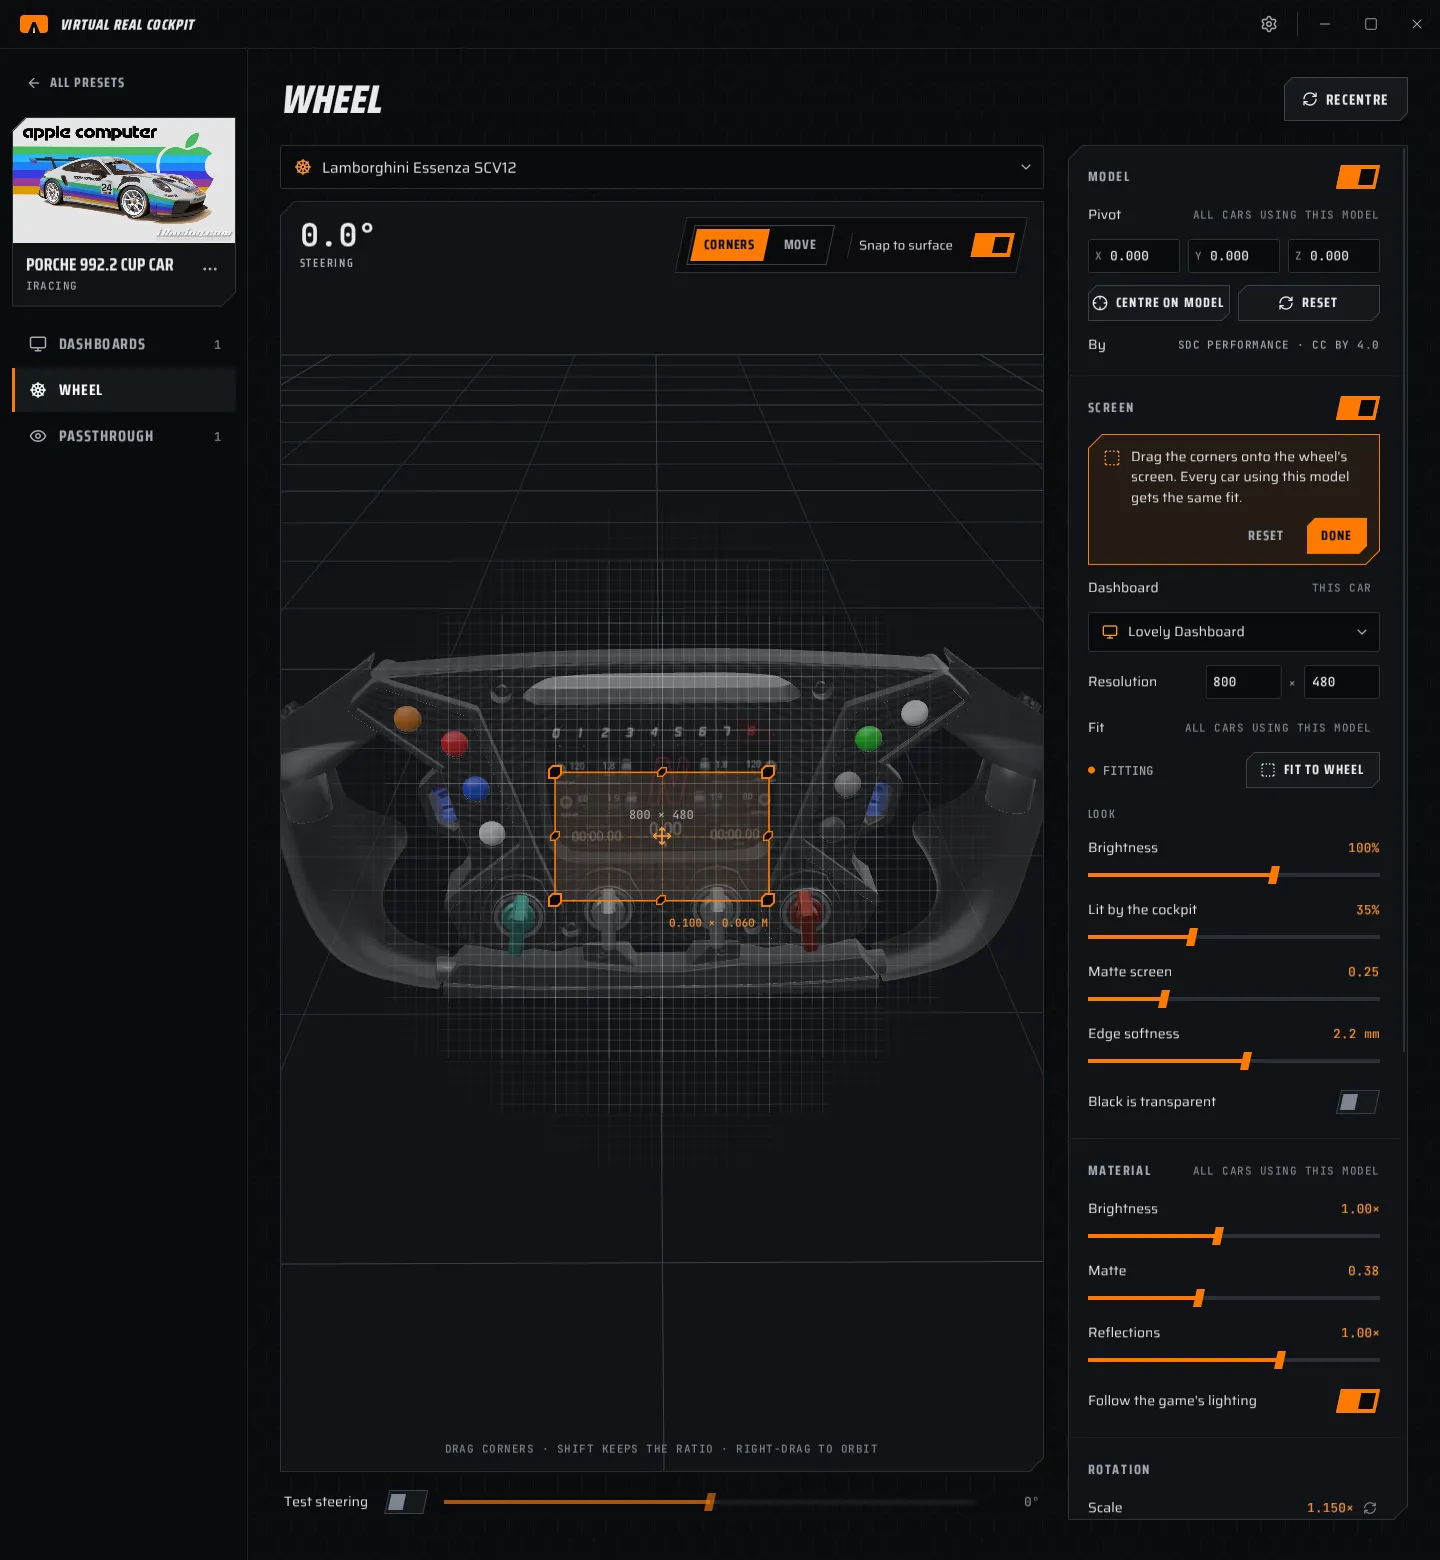
Right-drag orbits, scroll zooms. The readout under the screen shows its size, for example 0.100 × 0.060 M.
Rounded corners
Most wheel displays have rounded corners.
- In fit mode, choose RADIUS and drag a corner's dot inward. The readout shows R 6.0 MM.
- Or type the four values under Corner radius. The link icon sets all four together. With it on, Alt-drag changes one corner.
Screen depth
If the screen sits inside the model or floats above it, use Screen depth: plus moves it out towards you, minus into the wheel, from -10.0 to +10.0 mm. In fit mode, Alt + scroll nudges it. Double-click the slider to go back to 0.
LOOK
| Row | What it does |
|---|---|
| Brightness | 10 to 150 %. |
| Lit by the cockpit | How much the game's light and shadow reach the screen. |
| Matte screen | A soft veil, like a real display. |
| Edge softness | Soft edges, 0 to 4 mm. |
| Black is transparent | Black pixels become see-through. For dashboards drawn on black. |
MATERIAL
These change the model for every car using it.
| Row | What it does |
|---|---|
| Brightness | 0.2 to 2.0×. |
| Matte | Glossy (0) to matte (1). Shows the model's own value until you move it; the reset icon returns it. |
| Reflections | 0 to 1.5×. |
| Follow the game's lighting | Off: a neutral studio light, to check the model. |
COCKPIT SHAKE
See chapter 9.